The Montero Build

This is what we started with, an '03 Montero Limited we bought to replace our previous land barge, an '07 GMC Yukon, used to haul around four teenagers and one pre-teen. Four have since flown the coup so we downsized three years ago to the Monty. This is a third generation for this model, with generations I, II, and II.5 being formidable platforms for overlanding.


Being an avid follower back in the day of the Paris/Dakar when it actually went there, I became a fan of the Gen III, and, granted what remains factory in that competition is minimal, the performance and durability of the Gen III's platform won me over.

I've owned two, my first an '01. The main issue with the Gen III is there's very little aftermarket support. It thrives as the Pajero in Asia, Australia and Europe, but fizzled here in the States.
I've owned two, my first an '01. The main issue with the Gen III is there's very little aftermarket support. It thrives as the Pajero in Asia, Australia and Europe, but fizzled here in the States.
Mitsubishi missed the marketing train on the Paris/Dakar victories, an opportunity to position the Montero nicely against British and other Japanese offerings, not to mention the big three's SUV inventory. Instead they focused on rice-burning AWD rally cars with Subaru in their sights. Not to mention Mitsu's almost devastating $0 $0 $0 campaign from which they're still recovering.
This not only made the Montero a wall flower, it squelched any incentive for aftermarket development for both the Sport and full-size platform, a good thing for purchase price, and the bane for anyone looking to modify. Stock, the Montero already has a robust drive-train, some models with standard limited slip differential, and respectable nine-inch ground clearance. Outward visibility is terrific, rearward by comparison is great, and the cabin is well-appointed and thought out with one of the largest sunroofs offered.
Apparently Mitsu figured the American market would stick to Jeeps, leaving the Gen III Montero with plastic bumper caps and a departure angle rivaling UPS trucks. Aftermarket wheel offerings are limited given some models' air pressure sensors and the V6 has a tendency to pressure oil through the rear main.
We wanted a good sized SUV to support our kayaking and camping habits. I loved the driving position and handling characteristics of the Monty along with the room, interior design and appointments, the massive sunroof, and its limited-slip 4X set-up.

It's genealogy begins in a rental car fleet in SLC, Utah, then to a private owner, traded to a dealer where I found it. It's only flaw was a non-functioning seat-fold mechanism on the middle row. I had it repaired and it has since busted again with the same M.O. My first one did the same thing.
I guess my first mod was the Thule Crossroad Railing mounts with 65 inch load bars which hosted a variety of kayak racks and currently support a RTT.
I guess my first mod was the Thule Crossroad Railing mounts with 65 inch load bars which hosted a variety of kayak racks and currently support a RTT.
Next were the H&R 30mm spacers on all four corners widening the track and filling in the wheel wells a bit better. I updated the rubber with Cooper Discoverers ATP plus one in size and removed the stock running boards.

Interior Modifications
The rear door storage on the '03 Gen III Montero doesn't serve much purpose save for a poorly designed way to stash headrests from the third row seat and a narrow but deep pocket for stowage of small items.

I have a few Pelican cases no longer being used, so I thought to adapt a small case, the Pelican 1400, using it for a first aid supplies container, installing it onto the door replacing the pocket. While at it I picked up some Quick Fists to mount an ax, using the door pull hardware, where it'd be readily accessible.

I completed the door modification by adding two more QuickFists to hold a collapsable shovel, along with an ARB flat repair kit that fit well into the space with more velcro to prevent rattling around. A Maglight and a fire extinguisher round out the job.

A year after this mod, we've been for want of a work surface, a place to make lunch and such while on the road without much set-up when we stop. After the above mod, I saw that there's room to attach a shelf onto the steel reinforced pocket that once held the headrests for the third row seat when stowed.
I removed the panel and replaced the remnants of the straps that held the headrests in place with ones that I salvaged from an old day-bag back pack that have plastic quick release couplings. The straps were cut to length long enough to suspend the shelf at a right angle to the door and be adjustable. I fed the straps through the existing slits in the panel.
From Lowe's I picked up a 1"X12"X2' oak plank, sanded and finished it the same way I did the roof rack, and glued a black felt backing onto it. Installed hardware and riveted it to the pocket.

The plank is stowed with a gray elastic strap from an old cooler.


Stuff Rack
A coastal camping adventure brought about the idea of building a rack of sorts that would get sleeping gear out of the way of loading the big stuff into the Monty's cargo hold.


Stuff Rack
A coastal camping adventure brought about the idea of building a rack of sorts that would get sleeping gear out of the way of loading the big stuff into the Monty's cargo hold.


We use a topo map application loaded on an iPad on our trips and have wanted to mount it. I use the iPad everyday so I needed a way to be able to install and remove it easily, which won't be often since we'll just be using it on the trail. The other criteria to this little project; I'm cheap.
From our local emergency vehicle supply store I found a PanaVise mount at $29. From Lowe's I sourced a 4x5" tin plate and industrial Velcro for under $6 and put this together.
From our local emergency vehicle supply store I found a PanaVise mount at $29. From Lowe's I sourced a 4x5" tin plate and industrial Velcro for under $6 and put this together.


It's been rock solid. Just below is the CB install that went in about a year ago.
Used along with a Garmin GPS and the pictured iPhone with the Tiltomter app we can navigate with updated USGS maps pinpointing our location without wifi or cell signal.

Exterior Modifications
With the running boards removed the sills and rocker panels are vulnerable to damage from high centering. Rocky Road Outfitters in Heber, Utah, make a stout pair of rock sliders for the Montero.


I've considered alternate roof racks but for the time being want to put the serious money into suspension and recovery. The stock rack has served its purpose fine with a Thule system that holds the RTT and awning, but I want a tray in between the stanchions to hold other recovery and camping gear.
To this end I removed the headliner.
It's pretty straightforward, removing all the hardware of grab handles, interior lighting modules, sun visors, etc. The only hang up is in removing the sun visor clips with tabs that tend to break easily.
To this end I removed the headliner.
It's pretty straightforward, removing all the hardware of grab handles, interior lighting modules, sun visors, etc. The only hang up is in removing the sun visor clips with tabs that tend to break easily.

Remove the weather stripping on all doors. The A-pillar covers snap out being careful to keep retention clips in place, and second row seatbelt mounts on the B-pillars need to come off to remove the covers. The rear covers that surround the wing windows between the C and D-pillars snap out, again being careful to keep the retainers in place.

With the headliner free, the last step is to remove the electrical connection from the sunroof junction in the A-pillar,

...and then the main connector that attaches behind the driver's side footwell panel. The dead pedal needs to be removed to access this.

There are a number of attachment points along the route of this cable, the first of which is just above the main connector, the rest of which on the A-pillar are taped into place. Carefully remove the attachment points and feed the cable up behind the dash to the A-pillar junction being carful to route the cable so the connector egresses without snagging. Sounds harder than it is to remove.
With the cable free, remove the headliner.
With the cable free, remove the headliner.

Next out is the rear AC/Heating ducts, eight screws total holding it in place. It's U-shaped around the cargo area with a air-feed tube that goes up the passenger D-pillar.
With the ceiling cleared, the five nuts per side can be located, two at the rear and front and one in the middle.
With the ceiling cleared, the five nuts per side can be located, two at the rear and front and one in the middle.

Remove the nuts and the racks pop right out.
I considered a number of materials to use for the cross-members and settled on 1/2"X3"X4' oak planks from Lowe's connected to 2.5"X1 and 3/8" Stanley zinc plated mending braces attached with Arrow 3/16" aluminum rivets with 1/4" grip.
I considered a number of materials to use for the cross-members and settled on 1/2"X3"X4' oak planks from Lowe's connected to 2.5"X1 and 3/8" Stanley zinc plated mending braces attached with Arrow 3/16" aluminum rivets with 1/4" grip.


I wanted to allow varied placement of the Thule Crossroad Railing Feet while keeping the cross-members close enough to create parallel support to prevent sagging. I came up with 3" spaces between the 3" planks giving me 6" centers to mount the mending brace, resulting in room for five cross-members.
With the braces attached, I remounted the roof rails and reassembled the interior.
With the braces attached, I remounted the roof rails and reassembled the interior.

With these back in place I measured the width and cut down the oak planks to 41 and 5/8" in length, and mitered at the ends to fit the 22.5 degree angle of the stock rack.
I test fit the planks, fitting them underneath the mending braces to mark the holes, a pair on each end, to attach them. I number each plank to correspond to their position on the rack.
I stained and varnished the planks with a marine-grade product, three coats taking a couple of days.
I test fit the planks, fitting them underneath the mending braces to mark the holes, a pair on each end, to attach them. I number each plank to correspond to their position on the rack.
I stained and varnished the planks with a marine-grade product, three coats taking a couple of days.


I wanted the top to be relatively weather protected and nicely finished using stainless finish washers.

The oak allows me to mount stuff like RotoPax and MaxTrax mounts. A set of desert tan ones might look pretty good up there.
.jpg)

My concern was that this would come off "Clampett-ish" after the Beverly Hillbillies, but I'm more pleased that it's a bit cross-culturally reminiscent of a Woody or surf culture and I'm fine with that.
Bedliner Addition I decided to leave the Monty unclad and coat the exposed area with a bedliner, Duplacolor's Bed Armor with Kevlar. Got the kit on sale at Autozone for $75.
To prep out, I thought I'd fill the holes left by the cladding.


Sanded down the excess and found that some took...


I was sure to mask interior lines as well.


So, it's growing on me. It looks better photographed than live, and the farther away the better.


This is before:


And this after the cut:


And this after the coating:


Can't wait to see how it's going to look with these mounted on Mitsu steelies:

33" Big Horn Mudders from Maxxis. When the Old Man Emu suspension arrives, I'll get it all together.
Hi-Lift Jack Mount
A change in our camping setup along with the added rigidity of a roof rack mod got me to consider an alternate spot to mount a Hi-Lift. Before I had it mounted on a pair of Thule load bars, but in their absence since I won't be using the RTT, I created a mount on the factory rack using a pair of QuickFists following their instructions on how to use them for this purpose.

I drilled out the the holes in the QuickFists with a 3/8" bit. I measured the jack and decided on a 34" center that would allow the jack to mount through the holes on the ladder. With that measurement, I drilled two 3/8" holes, 34 inches apart on the passenger side roof rack, perpendicular to the side making it exit at the angle of the rail.

I inserted a 3" 3/8-16 bolt from the underside so the threads were pointing out of the rail. Anything longer than a three inch bolt will not clear the roof to access the hole.

The QuickFists were mounted on the bolts, along with four washers, a lock washer and a lock nut. (Were the bolt completely threaded I wouldn't have used the washers save one along with the lock washer - I was using existing hardware hanging out in my garage.)

With the QuickFists in place the Hi-Lift mounted on it using the protruding bolts to hold it in place. For my own peace of mind I added a fender washer and another lock bolt on top of that to cinch things down. Solid, rattle-free.
Illumination

Since I trashed the driver's side driving lamp on the Three Hour Tour, I've been looking for a replacement alternative to OEM. Prices were outrageous, at least for me, togo stock or upgrade, either way I was looking at $300+. So I rolled the dice and ordered a pair of Montero Sport driving lamps, under $75 for the pair and engineered a new mount for the lamps.


Rear Door Utility Shelf
We've been for want of a work surface, a place to make lunch and such while on the road without much set-up when we stop. I've modified the back door previously to stash an axe, a puncture kit, collapsible shovel, and a Pelican case first aid kit, and saw that there's room to attach a shelf onto the steel reinforced pocket that once held the headrests for the third row seat when stowed.
I removed the panel and replaced the remnants of the straps that held the headrests in place with ones that I salvaged from an old day-bag back pack that have plastic quick release couplings. The straps were cut to length long enough to suspend the shelf at a right angle to the door and be adjustable. I fed the straps through the existing slits in the panel.
From Lowe's I picked up a 1"X12"X2' oak plank, sanded and finished it the same way I did the roof rack, and glued a black felt backing onto it. Installed hardware and riveted it to the pocket.

I added a magnetic knife strip and some hooks to hold a few other cooking tools to complete it.

The puncture kit has been moved to the space inside the spare tire mount.
Black-out Hood and Dakar Logo
Having driven my share of westward returns at golden hour I've wanted to black-out the hood getting rid of that double whammy reflection. The contour of the Gen III's hood lines flow nicely to the grill leaving the popped round fenders to flank the black, framing it up nicely.
But I wanted to break up the mass of the black with a graphic, deciding on the Dakar logo to tie in the badges I added/ Here's how I did it:
But I wanted to break up the mass of the black with a graphic, deciding on the Dakar logo to tie in the badges I added/ Here's how I did it:

I googled the graphic and projected it on a wall where I hung some newsprint.

I traced the logo...

...and cut it out of the newsprint creating the template.

I taped the template to the hood and masked the exposed area...

...and then trimmed the mask through the template.

I masked the rest of the hood and removed it, suspended and shot it with Dupli-Color flat black trim paint, three coats.

Peeled off the masking. And this is the result.

I also shot the rest of the grill to blend the lines form the hood. I had previously painted the grill insert.

OME HD Install
The main modification I've been waiting to do is an Old Man Emu suspension upgrade giving the Monty the lift it needs, not easy to come by since it ships from Australia.
I measured wheel well and ground clearance.

Thirteen inches from the ground to the rocksliders and three inches in the wells.
I began with the front, removing the battery and tray on the driver side and the air box on the other, making access to the three nuts on top of each strut tower. Next it's necessary to remove the top A-arm. Remove brake and traction-control lines from the support on the arm. I then used a breaker bar and a 22mm socket to free the bolts for the A-arm and the strut tower mount and then removed that assembly.

I disassembled the strut assembly using spring compressors to take the load off the top of the strut tower, allowing its removal. I kept track of the order of the strut hardware for reassembling the new strut and spring components.
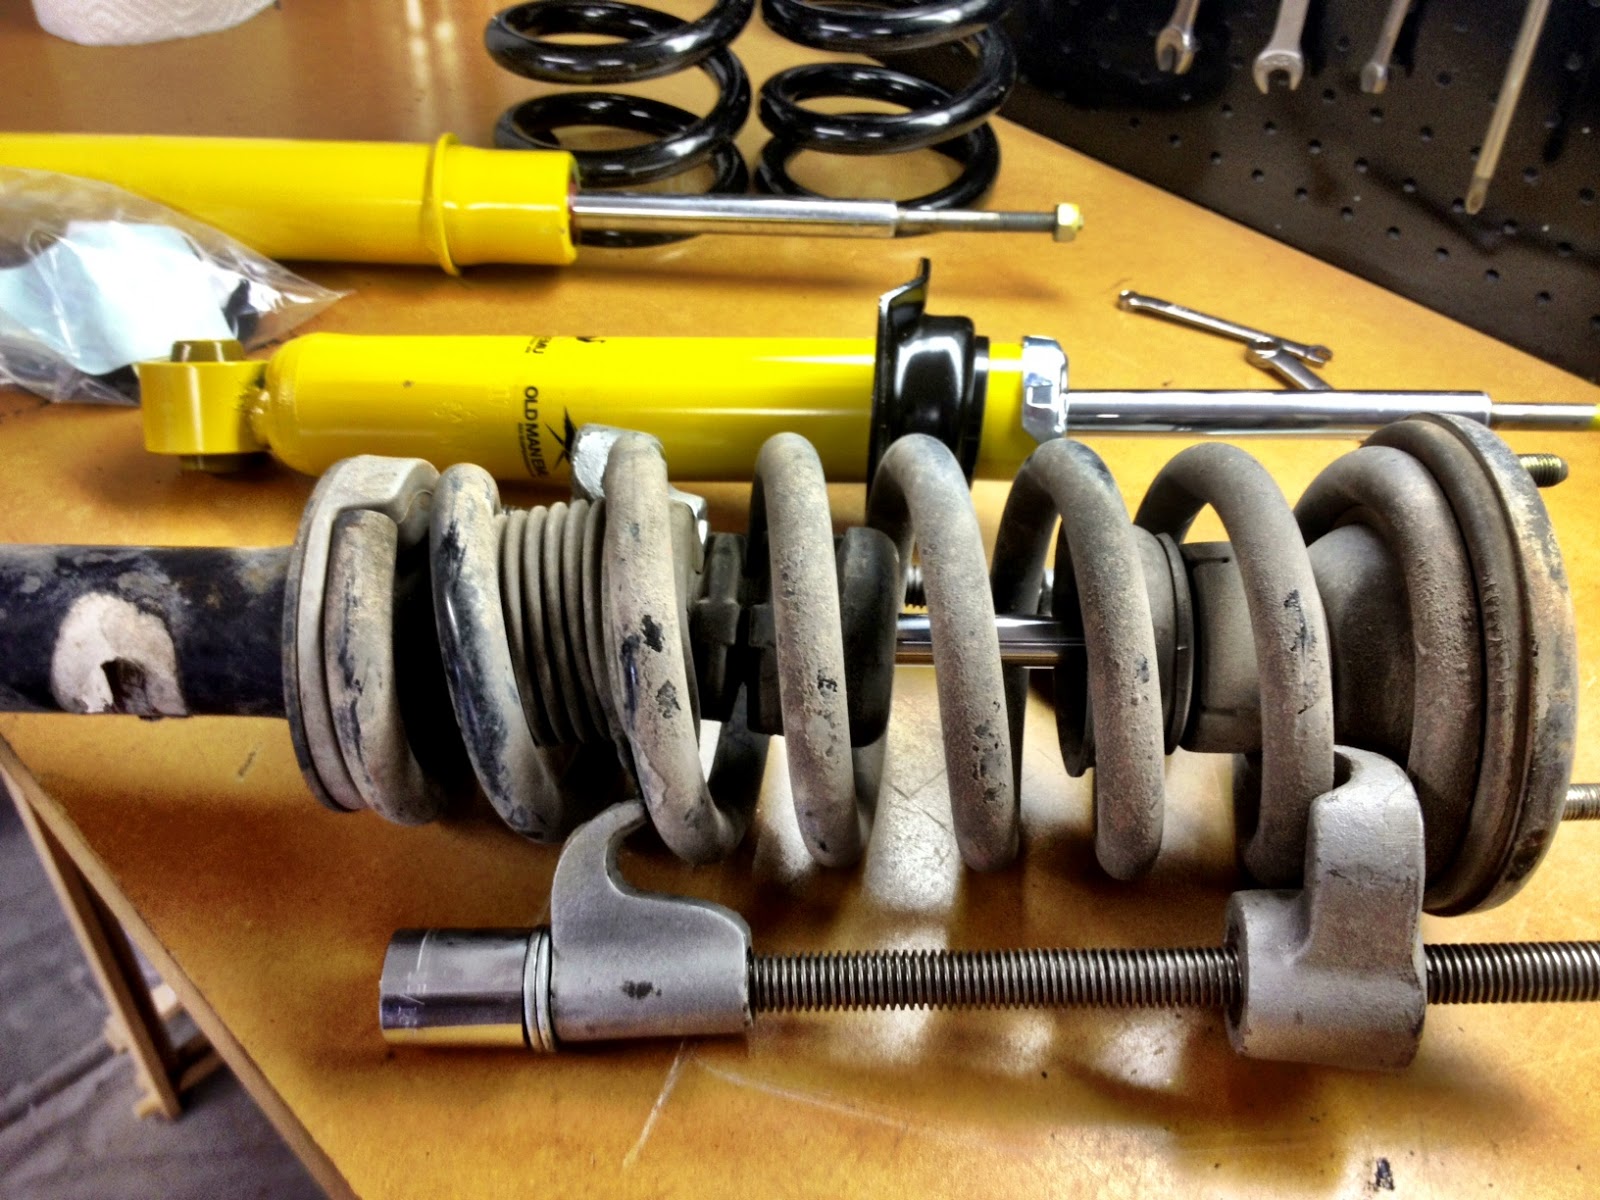
To do so, the new spring needs to be compressed. I made the initial mistake of not placing the spring compressor hooks at the farthest point on the spring and failed it compress it enough to get the strut nut to bolt on top.

When I repositioned the spring compressors I found I didn't have enough length, nor could I torque them enough to adequately compress the spring for the installation, so I took everything to a garage where I had them assembled.
Installation is straight forward, install the strut tower and secure the three nuts on top, attach the strut assembly to the lower A-arm, and then reattach the upper A-arm. Be sure to toque all bolts with the suspension loaded, that is to say, place a floor jack under the lower A-arm assembly and raise the assembly until its travel removes the suspension chassis from a placed jack stand, loading the A-arm assembly with the vehicle's weight. Torquing to specs this way eliminates damaging the bushings.

I was able to do the front install in about three hours with the Montero parked half-way in the garage to avoid the rain. I did the rear install in the driveway since the lift would have exceeded the height of my garage door.
For the rear spring and shock removal, the vehicle needs to be raised to a height adequate enough to drop the lower control arm far enough down to allow the spring egress.
I started by removing the nut at the top of the shock tower, then the connecting bolt at the lower control arm, and then removed the shock. Then I loaded the suspension assembly by lifting it with a floor jack using a short 2X4 underneath the arm. With the spring compressed I removed the bolt holding the arm and the hub assembly together, and then carefully lower the jack down, unloading the arm and allow the spring to drop out.
Assembly was done in the opposite order, being sure to roque all bolts with the suspension loaded as above. Done in about two hours.

The key to this was the height of the vehicle allowing the spring to come out freely once the control arm was dropped.
Once I seated the suspension on a short test drive I measured at the wheel well and from the ground to the rocksliders and realized a gain of two and a half inches.

Pre-lift...

And lifted.


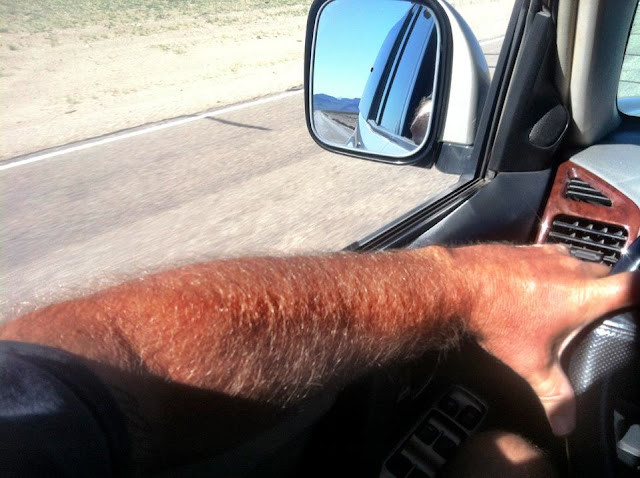
In driving, gone is any hint this was a luxury SUV. More feedback at the wheel, stiffer response, quicker turn-in, all providing a sense of being better connected to the road and trail.
Some shots in Warner Valley...


Middle-Seatectomy
After several hundred miles of traveling and camping with two Golden Retrievers, the non-functioning 60/40 middle seat became problematic. It took up too much space while providing little space in which Ginger and Mary Ann could get comfortable. It also encroached on cargo area, requiring some of our long and narrow kit to go up on the roof, like the double cot, tent pegs and table. Add that we rarely have passengers in that space, it was time to make a change.
There's a cable that attaches to a mechanism inside the middle bench that when deployed allows the bench to fold down and forward creating more cargo room. This cable on the 60 section has busted twice on us, debilitating the seat. I removed it by dismantling it from the hardware on its flanks giving me access underneath the seat bottom to the mechanism that releases it from its mount on the floor. Not the smartest thing to do in 105 degree heat, but it's out. I also removed the 40 seat - piece of cake on that one.
After measuring space and accounting for front seat travel I found the at 24" x 48" sheet of three quarter fiber board would fill the space nicely giving the dogs a few more square feet of room. I fashioned a set of braces that mounted with the existing seat hardware, creating room underneath the platform to stow the items that we'd normally put up top.

The platform is covered in gray trunk carpeting. It's attached to the existing seat mount hardware and to the center console.


There's a cut out to access the rear AC/heat controls.

It loads easily, holding the double cot, the Kodiak springbar tent hardware and the collapsable table.

Though it made for more room than the middle seat, 24 inches seemed too narrow to accommodate two large dogs so I added another eight inches and installed a pet barrier from PetsMart.


The barrier is attached to the eight-inch extension with 1/2 inch plastic plumbing wall attachments from Lowe's that fit around an oversized rubber grommet held in place by two nuts top and bottom. This allows the height to be adjusted and insulates any additional rattling.
The extra eight inches creates a cubby under which all of our sleeping kit can be stowed.


This comment has been removed by the author.
ReplyDeleteSorry for the delay - I just saw this comment. The bedliner is painted on. I decided to go that direction to avoid the masking needed for spray on, but in hindsight, I wish I went with a spray on liner.
DeleteThis comment has been removed by the author.
ReplyDeleteThis comment has been removed by the author.
ReplyDeleteVery nice Monty. And Well thought out mods! I have an 02 and am going to do some mods on it as well. With the bedliner kit did you spray it or paint it?
ReplyDeleteThanks for getting back to me. I really like your blog. It looks like you and your family have a blast!
Sorry to hear you got rid of her(the Montero), but the h3 looks cool as well. Which do your prefer?
I was also wondering about the rear cb antenna mount. I had mine on my Montero in the same spot, but in order to mount the spare I had to move it since there wasn't enough room. When it was on the back I got so much better reception and IMO it looked so much cooler.
Its not the white tire cover that is blocking it as I removed that a long time ago I think it made it look like a mall crawler. However the thing that's blocking it is the black plastic piece.
That should fix it.
very awesome build. i have been toying with adding bed liner to the bottom half of mine and after seeing yours i am sold.
ReplyDeletehave you run into any front bumper gaurds? i cant find one..
Unknown- also having a hard time finding bumper guards. only thing option i am thinking of is either trying to have someone build one or replacing the entire bumper with a ARB which is $$$.
ReplyDeleteAwesome build. I have been dreaming of this exact thing! I am probably going to go the ARB route for front bumper... Wondering if you know of anyone/ company that does a rear bumper with Jerry Can/Tire Mount?
ReplyDeleteYeah I really like his build too. It has given me a lot of ideas for my own. I have my OME springs coming in a few days so I can't wait to install them! I haven't seen a Jerry can/ tire mount mod yet. Seems like that would be a good idea though. I have seen the Jerry can mounts for the roof racks though. I like the way the look and I may go that way. I really want an Atv bumper but have. Even spending the money else where on my Montero. Like springs and tires. I am on a budget so the bumper may be a far off dream heh.
ReplyDeleteStupid phone and auto correct. Arb bumper.
DeleteI installed my OME spring onto my Montero and love them. I couldn't afford the entire kit and am waiting until money permits to get the rest of the kit.
ReplyDeleteHey quick question to you Eric. How did you modify the cb antenna to fit onto the back bumper and have room for the spare tire? I had my cb antenna mounted back there but had to remove it to have the spare on.
Hello there, I have one question... For the 33" Maxxis Big Horn, Do you use the stock rims? Because I have a pajero too, But I want to fit bigger tyres on it. I was thinking in 285/75/R16, but I don´t know if they fit on the stock rims. I'll wait your answer, thanks!!
ReplyDeleteSuper build! I own Pajero 03 and was searching for ideas for overland build and found this, straight to favorite!, amazing job!
ReplyDeleteHey! How did you do with the inner mud guards on the fenders?
ReplyDeleteIs the OME the heavy suspension or the Light front/Medium rear?
ReplyDeleteHey there! Amazing article! I'm currently looking to buy an 06 limited. Are there plenty of parts available for maintenance and what not? That is my main concern because of the discontinuation.
ReplyDeleteThank you!
Hey this is JP from above postings. If I remember right The op ended up getting rid of his montero for a hummer h3.
DeleteI also ended up getting rid of mine and do miss it.
Parts were not to bad when I was working on mine and I re did the entire engine.
There are plenty of them in the wrecking yards still and they share a lot of parts with the non full size montero sport and also with the Isuzu trooper as well.
There were a few parts that were dealership only so I did have to order them for instances the coolant pipe was dealership only.
Hope that helped.
Jordan
Good work, i have the same car....i'm tihinking four mount a bed with freezer and more....
ReplyDelete